 Tools
 Transcription
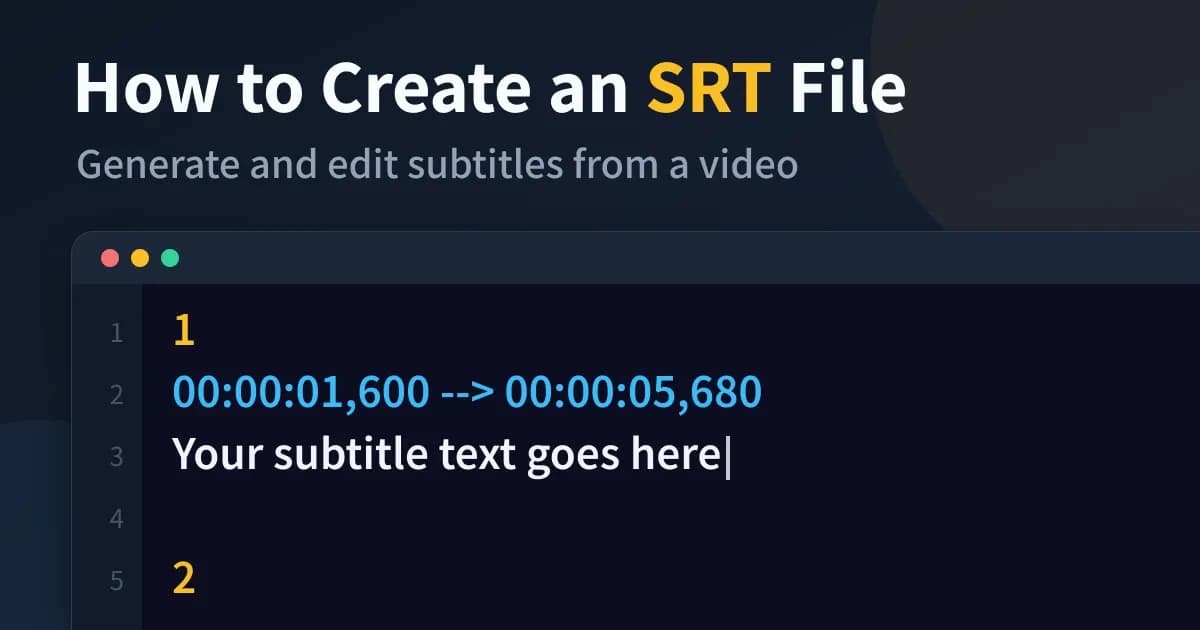
When you look up how to add subtitles to a video, the instructions often stop at "upload an SRT file" without showing what an SRT file looks like inside or how to make one.
An SRT file is a plain text file that lists each subtitle's number, the time it appears and disappears, and its text. You can write one in Notepad, but typing every timecode by hand takes longer the more subtitles the video has. I develop a video transcription tool called "Transcriber", and I also use it to make the subtitles for the videos I post on social media and YouTube.
This article shows what goes into an SRT file with a real example, then walks through generating an SRT file from a video, using the file once you have it, and fixing a file that will not load or shows garbled characters.
What You'll Learn from This Article
- What an SRT file is and how it is written
- The ways to create an SRT file, and how they differ
- How to generate an SRT file from a video
- How to play or upload the SRT file you made
- What to do when an SRT file will not load or shows garbled characters
Writing one by hand needs nothing more than a text editor, and generating one from a video needs only the video file and a browser. There is no software to install and no account to create, and nothing along the way costs money.
What is an SRT file?
An SRT file stores a video's subtitles as a list of entries, one per subtitle, each with a sequence number, the times the subtitle appears and disappears, and the text to show. The extension is .srt. The format comes from a subtitle program called SubRip, and according to the Library of Congress description of the format, there is little to no formal documentation for it.
Here are the first three entries of an SRT file exported from Transcriber, exactly as they came out.
1
00:00:00,952 --> 00:00:04,392
However, due to the slow communication channels,

2
00:00:04,392 --> 00:00:09,224
styles in the West could lag behind by 25 to 30 years.

3
00:00:11,896 --> 00:00:13,816
The Northern Marianas
Each subtitle is made of four parts.
- Number: a sequence number, starting at 1
- Timecode line: the start time and the end time joined by
-->. The format is hours:minutes:seconds,milliseconds, with a comma before the milliseconds - Text: what appears on screen, on one line or more
- Blank line: marks the end of the subtitle
SRT vs VTT
The format most often mentioned alongside SRT is VTT (WebVTT). The two look very similar and differ mainly in small details of syntax.
SRT | VTT (WebVTT) | |
|---|---|---|
Extension |
|
|
Start of the file | Begins with the first subtitle | A |
Subtitle numbers | Included | Optional |
Before the milliseconds | Comma ( | Period ( |
Character encoding | Not specified | UTF-8 is required |
On YouTube | Supported as a basic format | Supported as an advanced format |
The W3C WebVTT specification requires a VTT file to be encoded as UTF-8, while the SRT format has no character encoding standard. YouTube's help page says that only basic SRT files are supported and that no style information such as bold or color is recognized. YouTube, VLC and the video editors covered later all read SRT, so if you are unsure which to make, make SRT and convert it when something asks for VTT (how to convert is covered in "Opening, editing and converting an SRT file you already have" below).
Ways to create an SRT file, compared
There are three ways to make an SRT file: write it by hand in a text editor, build it with the subtitle feature of a video editor, or generate it from the video with a transcription tool.
Method | How the text goes in | How the timing goes in | Cost |
|---|---|---|---|
By hand in Notepad or TextEdit | You listen and type each subtitle | You pause the video and type each timecode | Free |
Subtitle feature of a video editor | You type each subtitle in the editor | You stretch each subtitle on the timeline | Depends on the editor |
Transcription tool (Transcriber in this article) | Filled in from the audio; you fix the mistakes | Filled in from the audio; you fix the lines that are off | Free |
Writing by hand suits a short video that needs only a few subtitles, or touching up part of an SRT file made some other way. A video editor is the choice when you already edit the video there and want to finish the subtitles in the same place. DaVinci Resolve, for example, can render subtitles into the final video or export them as separate TTML, SRT or VTT files, according to Blackmagic Design.
I make my own subtitles the third way, with Transcriber, the tool I built. It transcribes inside the browser, so neither the video nor the transcript is sent to an outside server. The steps later in this article use it.
Writing an SRT file by hand
To write one by hand, type the entries in the same layout as the example above, separating each subtitle from the next with a blank line, and save the file as UTF-8 with a name that ends in .srt.
- Notepad on Windows: since Windows 10 Build 18298, Notepad saves new files as UTF-8 without a byte order mark by default and shows the file's encoding in the status bar, as Microsoft announced on the Windows Insider Blog. Type a name such as
subtitles.srtwhen saving, and check afterwards that the file name does not end in.srt.txt. - TextEdit on a Mac: TextEdit opens new documents as rich text, so choose Format > Make Plain Text first. Apple's TextEdit guide says a plain text document is saved as a .txt file, so change the extension to
.srtafter saving.
What you need
- The video file you want subtitles for (MP4, MOV, MKV, WebM and so on; an audio-only file works too)
- Chrome or Edge on a PC (Chrome 138 or later, or Edge 148 or later, if you also want translated subtitles)
- If you only want to fix an SRT file you already have, that SRT file
Transcription also works in a phone browser, but a phone can only process shorter files than a PC, and the translation feature is not available there, so this article uses a PC.
Step 1: Generate an SRT file from the video

Generate timecoded SRT subtitles from audio or video for free. Processing happens inside your browser, so files are never sent anywhere. Check captions while the video plays, edit the wording before export and distinguish speakers. You can also open an SRT file you already have to edit or convert it.
Transcriber starts transcribing as soon as the video is loaded, so set the language, the model and speaker diarization first.
- Open the "Subtitle (SRT) generation" page of Transcriber
- Under "Language", choose the language spoken in the video ("English" for an English video)
- If only one person speaks in the video, set "Speaker diarization" to "Off"
- Drop the video file onto the drop area, or click the area and choose the file
- Keep the tab open until the transcription finishes
Speaker diarization matters here because an SRT exported with it on starts each subtitle with the speaker's name, such as "Speaker A: ". Speaker diarization is on by default, so switching it off before loading a video with a single speaker saves deleting those names after export. For a conversation where you want the subtitles to show who is speaking, leave it on.
You can leave the model on its default. For English, the default is Parakeet Ultra on a PC with integrated graphics in Chrome or Edge, Whisper Large v3 Turbo on a PC with a dedicated GPU (Whisper Small on older GPUs), Whisper Small on a Mac with Apple silicon, and SenseVoice Small on phones, on PCs without WebGPU and in Safari or Firefox on PCs with integrated graphics. For Japanese videos I leave it on the Japanese default, Haas-ja v1.0. How accurate and how fast each model is on an English video is covered in "How to Transcribe an MP4 Video to Text".
Subtitle length and the model
How long each subtitle comes out depends on the model. Parakeet Ultra ends a subtitle at the end of each sentence, and splits any line longer than 84 characters or 8 seconds at the longest pause inside it. A line over 160 characters is split at a word boundary even when there is no clear pause. The limit of 84 characters is two lines of 42, which matches the 42 characters per line and two lines at most in Netflix's English timed text style guide.
For this article I built a test video of about 10 minutes (606.2 seconds) from 63 English read-speech clips in FLEURS, a public speech dataset, and had Chrome transcribe it with three models. The figures are character counts per subtitle in the exported SRT, including spaces and punctuation and excluding speaker names.
Model | Subtitles | Median length (characters) | Longest (characters) | Over 42 characters | Over 84 characters |
|---|---|---|---|---|---|
Parakeet Ultra | 125 | 59 | 146 | 93 | 25 |
SenseVoice Small | 81 | 87 | 370 | 68 | 43 |
Whisper Large v3 Turbo | 67 | 108 | 299 | 66 | 52 |
Parakeet Ultra split one read sentence into two subtitles at the comma, as in the example in "What is an SRT file?" above, and produced the shortest subtitles of the three. Whisper Large v3 Turbo mostly made one subtitle per clip (67 subtitles for 63 clips), and SenseVoice Small sometimes ran two or three sentences together into one subtitle when it left out the period, which is where its longest subtitle of 370 characters came from.
None of the three models broke a subtitle into two lines; every subtitle was a single line of text, so wrapping is left to the player. Transcriber also has no setting that splits subtitles at a fixed number of characters, so even with Parakeet Ultra, 25 subtitles were longer than two 42-character lines. The BBC subtitle guidelines give 37 characters per line for landscape video and the equivalent of 25 characters for vertical 9:16 video, so for vertical video or video watched on a phone, play it with the subtitles over it in Step 2 and split the long ones by hand.
Step 2: Fix the wording and timing with the subtitles over the video
When the transcription is done, playing the video in the player on the result screen shows the transcript as subtitles over the lower part of the picture. Before exporting, fix these three things on this screen.
- Subtitles that are too long: hover over the line, click the pencil icon, put the cursor where you want to split, and press "Split at cursor"
- Timing that is off: click the line's time, or choose "Edit times" from the line's "⋮" menu, and retype the start and end in seconds (down to hundredths)
- Text nobody said: for a line that appeared over music or near-silence, choose "Delete line" from the "⋮" menu
When the same name or term is misheard in several places, "Find & replace" on the result screen fixes them all at once. Where lines nobody said tend to appear, with an example from my own measurements, is covered in "How to Transcribe an MP4 Video to Text".
Step 3: Export it as SRT
When you are done fixing, open "Download" below the result and choose "SRT (subtitles)".

The SRT that Transcriber exports follows these rules for timing and text.
- A subtitle shown for less than 0.8 seconds is extended to 0.8 seconds (without going past the start of the next one)
- No subtitle ends after the next one starts
- Blank lines inside a subtitle's text are removed, because in SRT a blank line ends the subtitle and shifts every subtitle after it
- The file is written as UTF-8 without a byte order mark
YouTube asks for SRT files in plain UTF-8, so the exported file can be uploaded as it is, without changing the encoding.
Exporting translated or bilingual subtitles
To make subtitles in another language, open "Translate" on the result screen, choose the source and target languages, and press "Translate". The translation appears under each line and can be exported as subtitles. Translation uses the translator built into Chrome 138 or later and Edge 148 or later on a PC, so the transcript does not leave the device. The first time a language is used, its translation model is downloaded. In my tests, translating a 3-minute Japanese video (25 lines) into English took about 7 seconds including that download, and translating a 3-minute English video (40 lines) into Japanese took 30 to 60 seconds.
Once the result is translated, the "Original", "Translation" and "Both" switch to the left of "Copy text" chooses what is exported. "Both" produces an SRT with the original and the translation on two lines within each subtitle.

1
00:00:01,600 --> 00:00:05,680
インターネットで敵対的環境コースについて検索すると、
Search the Internet for hostile environmental courses
Opening, editing and converting an SRT file you already have
SRT files made in other software, or ones you exported earlier, can also be opened and fixed in Transcriber. Choose an SRT or VTT file in the file picker, and the result screen opens with the subtitle lines listed, without transcribing anything.
Choose one subtitle file and one video file together, and you can play the video with the subtitles over it to check them. The screen below shows the SRT exported in Step 3 loaded together with the original video. The file name row shows the video's name, but the subtitles over the video and the lines listed below come from the SRT file.

Once it is open, it is the same screen as a transcription result, so the splitting, timing fixes and deleting from Step 2 and the translation and export from Step 3 all work as they do there. Choosing "VTT (WebVTT subtitles)" under "Download" converts the SRT to VTT, and "Translate" makes subtitles in another language.

If 90% or more of the subtitles start with a name, as in "Speaker A: text", the names are read as speakers, so an SRT exported with speaker diarization on gets its color coding by speaker back when you open it again.
Using your SRT file
I often use exported SRT files to watch foreign-language videos with translated subtitles. For playback I use VLC (VLC media player) and the result screen of Transcriber. Playing in Transcriber is covered in the previous section, so this one covers playing in VLC, uploading to YouTube and video editors, and burning the subtitles into the video.
Playing it in VLC
When the video file and the subtitle file have the same name, VLC opens the subtitle file automatically when you open the video, according to the VideoLAN wiki. If the video is lecture.mp4, rename the exported SRT to lecture.srt and put it in the same folder as the video.
When the names cannot match, for example when you keep both a translated SRT and an original one, add the subtitle file from VLC's menu. The VLC user documentation describes loading subtitles from Video > Subtitle Track, and the screen for choosing a subtitle file also lets you set the character encoding.
Uploading it to YouTube Studio and video editors
For a video you have posted on YouTube, you can add an SRT file from "Subtitles" in the left menu of YouTube Studio. According to YouTube's help page, you choose the video, select "ADD LANGUAGE", then "ADD" under Subtitles, then "Upload file", and choose "With timing" for a file that already has timecodes, as an SRT file does. The file has to be in plain UTF-8.
Among video editors, Apple's Final Cut Pro imports SRT files through File > Import > Closed Captions (Final Cut Pro User Guide), and DaVinci Resolve supports importing SRT subtitles (DaVinci Resolve). I do not use either of them for subtitle work, so for the import steps, see each editor's official documentation.
Burning subtitles into the video
Where the player cannot load a subtitle file, as with videos posted on social media, the subtitles have to be drawn into the picture itself, which is called burning them in. "Burn subtitles into video" on Media Tools, another web app I built, does this inside the browser. It reads UTF-8 subtitle files (and Shift_JIS, which is common in Japanese subtitle files), so an SRT saved in another encoding should be re-saved as UTF-8 first. The steps, and the difference between drawing the subtitles into the picture and packing them into the video as a separate track, are in the article below.

No install, no upload. Transcribe a video, fix the SRT, and burn the subtitles into the picture — all inside your browser, free and without an account.
When an SRT file won't load or shows garbled characters
When an SRT file will not load or shows garbled characters, the cause is usually either the character encoding or a mistake in the format.
Accented letters or quotation marks look wrong
The SRT format has no rule about character encoding, so two .srt files can be saved in different encodings, such as UTF-8 and Windows-1252. The Library of Congress page notes that SubRip's default output encoding is Windows-1252, and Microsoft's documentation describes code page 1252 as "ANSI Latin 1; Western European (Windows)". An SRT made with older software may be in that encoding.
Plain English letters are stored the same way in both encodings, so the difference shows up in accented letters such as é and in curly quotation marks. Transcriber reads subtitle files only as UTF-8, so those characters in a Windows-1252 SRT do not come out correctly. YouTube also asks for UTF-8, so when the characters look wrong, open the SRT file in a text editor, save it again as UTF-8, and then load it. In Notepad on Windows, the status bar shows the file's encoding, so you can check which one it is before saving.
It won't load, or the subtitles drift out of order
If the file is UTF-8 and still will not load, or the subtitles go wrong partway through, the format may have a mistake. In an SRT you wrote or edited by hand, check these two things.
- Each subtitle is followed by a blank line (in Transcriber, a missing blank line makes the next subtitle's number and timecode line part of the previous subtitle's text)
- The timecode lines are in the form
00:00:01,600 --> 00:00:05,680(the arrow is two hyphens and ">")
If Transcriber shows "The subtitle file could not be read. Check that it is in SRT or WebVTT format.", it did not find a single timecode line it could read, so check the form of the timecode lines.
Frequently asked questions
Can I create an SRT file in Notepad?
You can. Write the number, the timecode line, the text and a blank line for each subtitle, in the same layout as the example in "What is an SRT file?", and save it as UTF-8 with a name that ends in .srt. You do have to type a timecode line for every subtitle.
Can I make an SRT file from a script I already have?
Not with Transcriber. It takes the text and the timing from the audio, and it cannot load a plain text script and add timecodes to it. Generating the subtitles from the video and correcting the wording against your script on the result screen gets you to the same file.
Can generated subtitles be split at a fixed number of characters per line?
No. Transcriber has no feature that splits subtitles to a fixed length, and where each line breaks is decided by the model. Split long subtitles one at a time with "Split at cursor" on the result screen.
What should I use to look inside an SRT file?
An SRT file is a text file, so opening it in a text editor such as Notepad or TextEdit shows the numbers, timecodes and text as they are. To see where each subtitle appears in the video as well, open it in Transcriber together with the video; you can play the video with the subtitles over it and check the lines in the list.
Are my video or subtitle files sent to a server?
They are not. Transcription and loading subtitle files happen only inside the browser, so the video, the audio and the subtitle text never leave your device. Transcriber does send statistics used to fix problems (such as device specs, the model chosen, the kind of error and the format chosen under "Download") to the site's server, but these do not include the audio, the transcript, file names or IP addresses. You can turn this off with the switch in the "Help us improve the service" section at the bottom of the page.
Is it free, and can I use it without an account?
It is free and needs no account. Transcriber does not ask for an email address, and there is no limit on how long or how many times you can transcribe.
Summary
For a short video that needs only a few subtitles, you can write an SRT file by hand in a text editor, listing a number, a timecode line, the text and a blank line for each subtitle. For anything longer, generating the file from the video with a transcription tool fills in the text and the timing from the audio, so you only have to fix the wrong words and the lines whose timing is off. Making an SRT file from a video with Transcriber takes three steps.
- Set "Language" and "Speaker diarization", then load the video file
- Play the video with the subtitles over it on the result screen, and fix subtitles that are too long, timing that is off and text nobody said
- Open "Download" and choose "SRT (subtitles)"
If you open the exported file in another editor before uploading it to YouTube, save it as UTF-8 again. YouTube's help asks for SRT files in plain UTF-8, and some editors save in another encoding such as Windows-1252, where accented letters and curly quotation marks are stored differently.
Related articles and tools

How to turn an MP4 or other video into text or subtitles, compared with Microsoft Word, ChatGPT, Gemini, YouTube and cloud transcription services using their official limits. The video is never uploaded, and I include the processing times and error rates I measured on an English video.

A step-by-step guide to turning a recorded X (formerly Twitter) Space into text for free. Covers downloading the recording, separating speakers and exporting subtitle files — all in your browser, with no account and nothing to install.

Free background music remover for video. AI strips the music and keeps speech and sound effects, and the picture is copied without re-encoding. Runs in your browser, so the video is never uploaded. No sign-up. For Chrome and Edge on PC.
 media.tools.ryusei.io
 Programing
 Python
 Hosting