
This is @ryusei__46 speaking.
In this article, I'd like to share some insights on how to assign global IP addresses to local servers and virtual machines running at home—whether they're Docker containers, Windows WSL environments, or similar setups.
This is particularly useful for scenarios like:
- Making a small website or web application accessible externally
- Setting up a file server that can be accessed from outside your home network
- Using it as a VPN server for your home connection
I believe this method is highly recommended for these purposes.
The approach I'll introduce involves directly connecting to an external network via PPPoE and assigning a fixed global IPv4 address. To implement this method, we'll use Interlink's "ZOOT NEXT" service.
I primarily use this method for assigning global IPs to my home servers. The reason is simple—it requires almost no complex network configuration.
Even when assigning a global IP to the server, convenient command-line tools make it quite straightforward.
Without further ado, let's dive into the explanation.
Prerequisites
Additionally, if you're currently subscribed to "NTT Flette's Hikari" and want to switch to Interlink's "ZOOT NEXT," you'll need to specify your preferred line type during the application process—please verify your options in advance.
One important provider to note is "NURO Light"—since it doesn't utilize NTT's optical fiber network, the methods described here won't be applicable.
That said, even if you're using "NURO Light", Interlink's "MyIP" service remains an option for applications where network bandwidth isn't critical. This service allows you to establish VPN connections to Interlink's servers and obtain fixed global IPv4 addresses. However, note that speed limits are applied—it's only suitable if you're comfortable with these limitations. From my previous experience, the maximum speed appeared to be around 120 Mbps.
Obtaining and subscribing to fixed global IP addresses
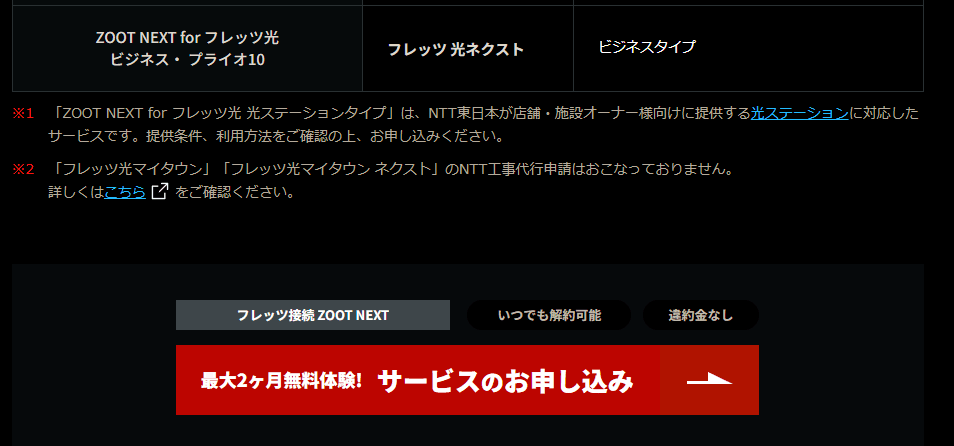
First, let's proceed with the fixed global IP address acquisition process from the Interlink "ZOOT NEXT" page.
The page includes a compatibility chart for NTT line types that support this service, so be sure to verify your specific type. There are options available for both NTT East and NTT West.
After verifying, click the "Service Application" button at the bottom of the page. As of my writing, a 2-month free trial is available, so you can easily sign up and cancel immediately if it doesn't meet your needs. Since I started using Interlink around 2021, they've consistently maintained this free trial period, so I don't expect any promotional discounts.
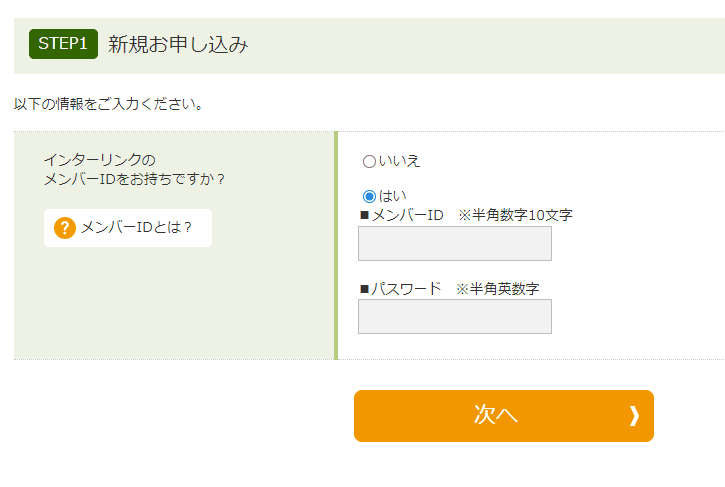
On the next page, you will be prompted to log in with your Interlink member ID. If you're new, please select "No" and proceed with the registration process.
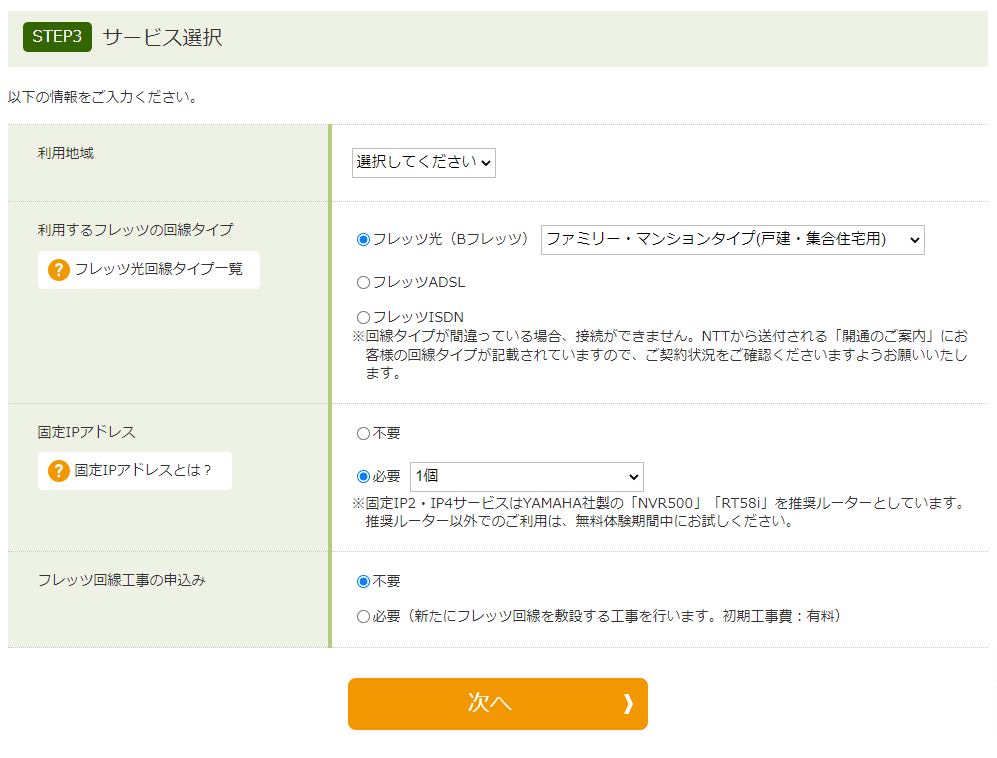
When you proceed, you'll be presented with a service selection screen where you need to enter details for: "Service area," "Flets line type," and "Fixed IP address." Complete these fields before continuing.
After completing the payment process on the next page, you'll be shown a confirmation screen where you can finalize your application. Once your application is successfully accepted, you'll see a link to your My Page on the completion page—open it and log in using your registered ID and password.
Now, let's proceed to obtain the authentication credentials for assigning the acquired global IP address. Click "Contract Information Confirmation" in the left menu of your My Page to display your subscribed services, then click "Confirm" to open the "Interlink Membership Registration Notice (Web Version)."
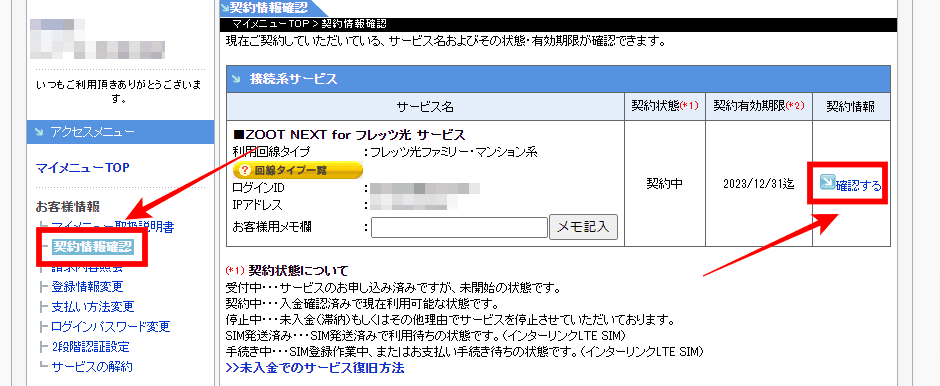
When the "Interlink Membership Registration Notification (Web Version)" appears, check the "Information Required for FLET'S Connection" section at the top.
Note down the following details, which will be needed when establishing a PPPoE connection to the server:
- Connection username
- Connection password
- Fixed IP address
Set a fixed global IP address for the server
Now, let's remote-login to the server and execute the following command in the terminal. For this example, we'll configure it on an Ubuntu 22.04 machine.
sudo apt-get install -y pppoe pppoeconfThis has installed the packages needed for PPPoE connections.
Before starting PPPoE connection setup
Depending on your router model, you may need to configure either "PPPoE Passthrough" or "PPPoE Bridge" functionality. Without this setup, hosts directly connected to your router won't be able to establish PPPoE connections independently.
The router I'm using is an NTT model called "RS-500KI." This wasn't a custom-selected router—it was provided by NTT when I took service with them.
To verify the configuration settings, open your web browser and access the router's IP address (default gateway) at http://192.168.1.1.
When you first access the settings interface, you'll likely be prompted to register a user ID and password for login—please complete this registration process yourself.
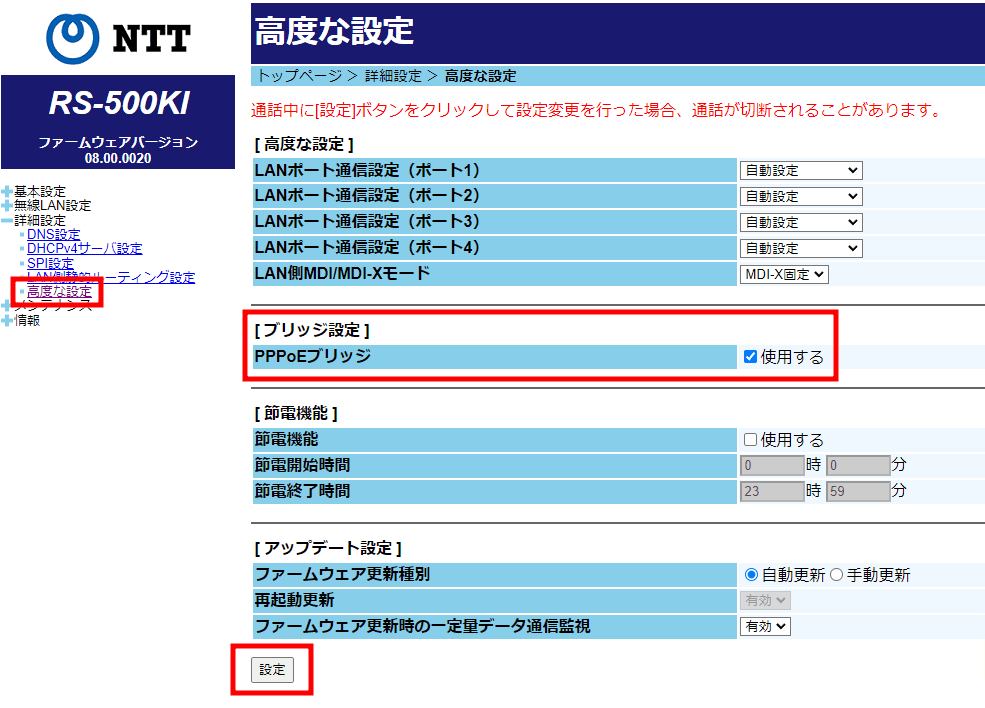
On the "Advanced Settings" page under the left menu's "Detailed Settings," verify that the "PPPoE Bridge" option is checked in the "Use" field.
To begin configuring PPPoE connections, execute the following command:
sudo pppoeconfThis command handles everything automatically—from configuring connections to executing the initial connection and even automatic execution on system restart.
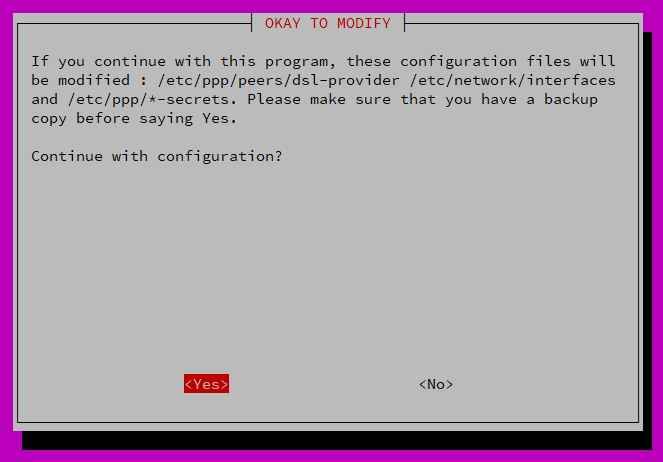
For new settings, "Yes" is appropriate.
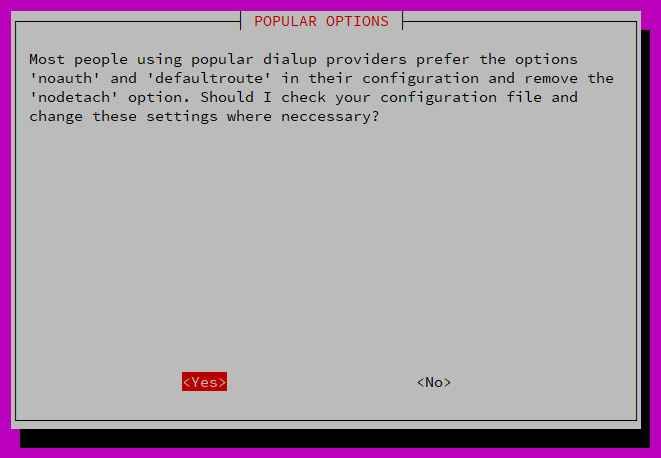
It seems to automatically check whether any settings need to be changed, so "Yes" should work fine in this case as well.
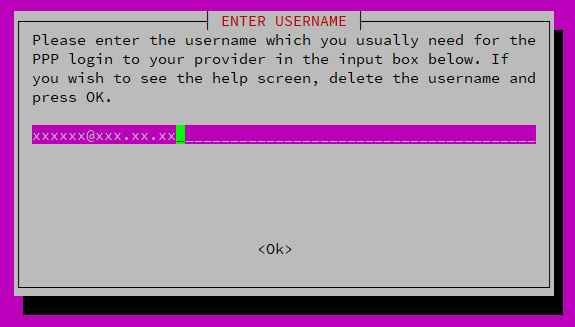
Here, enter the "Connection Username" you noted earlier under the "Interlink Membership Registration Notification Web Version."
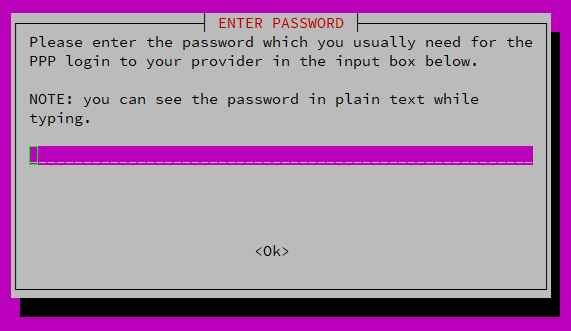
Here, enter the "connection password" as well.
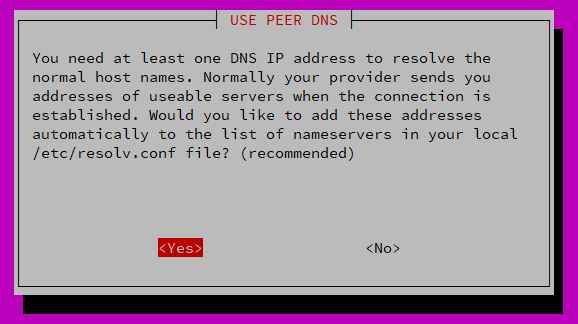
Select "Yes" if you want the DNS IP address to be automatically obtained.
If there are no particular issues, we will proceed with "Yes."
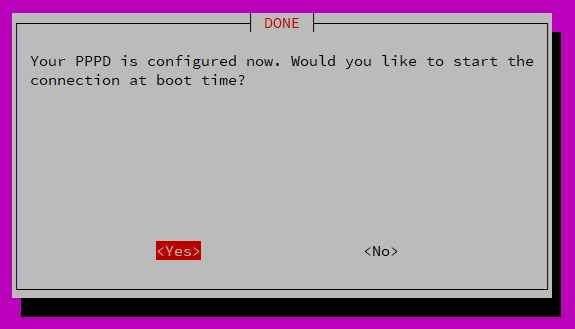
Select "Yes" if you want to connect automatically when the system starts.
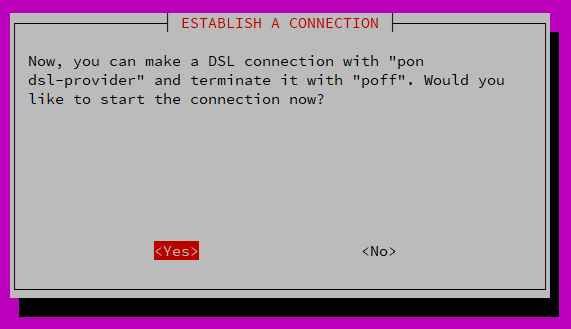
I'd like to start connecting now, so I choose "Yes."
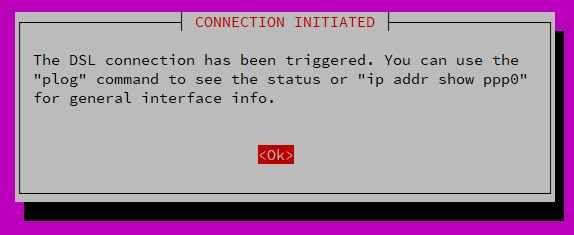
The connection is now complete. You can verify the connection status using the ip addr show ppp0 command.

This will make the server publicly accessible worldwide, so don't forget to configure your firewall settings.
Conclusion
Initially, I was considering subscribing to NTT's FLET'S Hikari fixed IP plan to allocate static IP addresses, but ultimately Interlink proved more cost-effective. More importantly, being able to easily apply for multiple IP assignments and obtain global IP addresses was a significant advantage.
For my specific use case, I installed a VPN server at home to enable remote access to both a file server and web server within my LAN. While my primary web server has since been migrated to Conoha VPS due to reliability concerns, my file server remains managed at my parents' house.
Regarding Interlink's "ZOOT NEXT" service mentioned earlier, since its connection uses PPPoE, transfer speeds can become quite unstable during peak usage periods. Therefore, if you're prioritizing stability, I'd recommend Interlink's "ZOOT NATIVE" (IPv4 over IPv6) instead. However, note that this service requires using a router compatible with "DS-Lite."